
Shadow Box Molding

I’m all about finding ways to dress up the walls in my dollhouse. For a recent project, I wanted to add a thin strip of shadow box molding along the base of the room. It is a pretty straightforward project, and adds really fun detail to a room (as long as you get the scale right). Give yourself ample drying time between steps and enjoy!

What You Will Need
Balsa sheet
Birch stir sticks
Ruler/measuring tape
Pencil
Cutting mat
Utility knife
Easy Cutter
Wood glue
Spackling paste
Binder clips
Sanding block
Dollhouse Chair Rail

1.
Decide on the height of your trim. I wanted to split a 3” piece in half, so am working on 1.5” trim pieces. Mark your trim line with a very fine pencil.

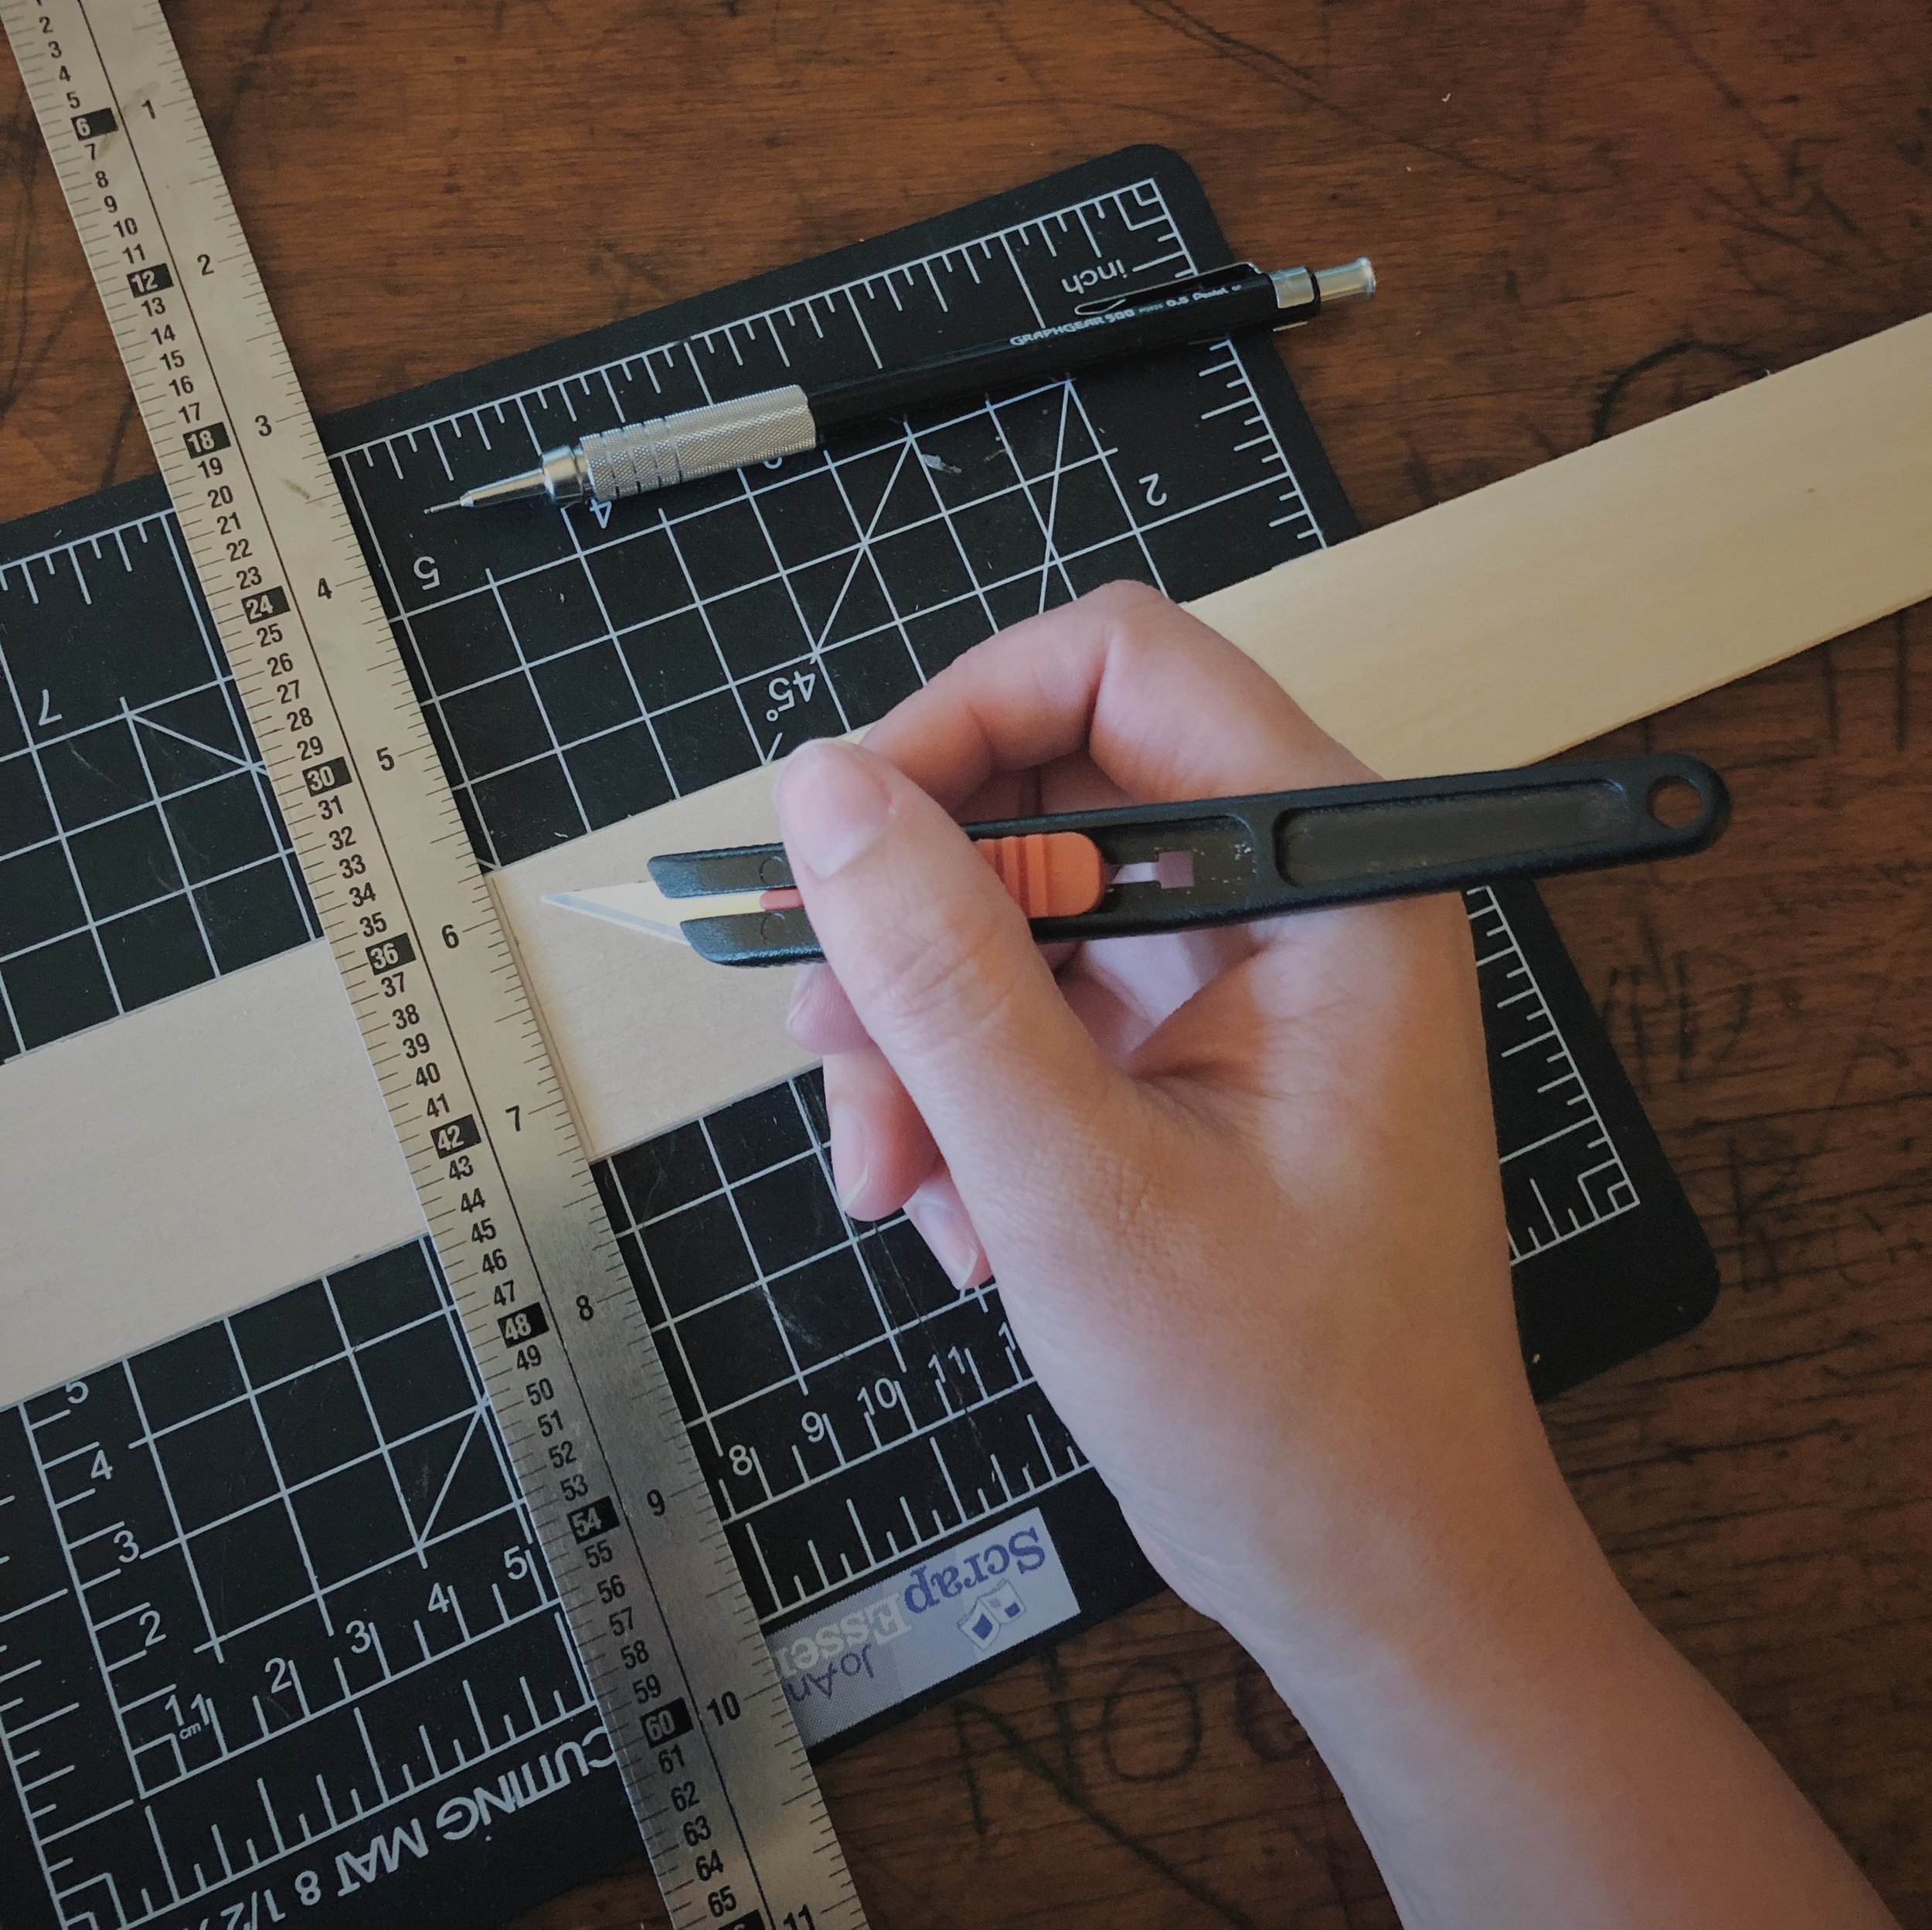
2.
Cut down your balsa sheet using a utility knife and cutting mat.
(Stop laughing at my miniature cutting mat. I have a bigger one, but I’m somehow charmed by this tiny version.)
3.
Trim to width. This would be the width of the wall you wish to trim. Lightly sand your cut ends.

4.
Now comes the fun part. Design your trim pattern!
I like to do a little Pinterest research first. Then I get wildly distracted. And, hours later, return to actually plan out my pattern.
The sections don’t have to be the same size, but it is convenient if they are.

5.
When you are happy with the spacing and are finished, you can erase any extra lines. I’m painting mine, so it doesn’t really matter. But, perfectionism.
I’ll be placing my trim on the insides of these marks.

6.
Now break out the Easy Cutter. If you don’t have one, now might be the time. I actually have two. The larger version is great for lots of different angles. You’ll really only need 45 degree angles for this project though. Cut your first angle.

7.
Measure your first piece against your template. I like to start with the longer sides.

8.
Mark your template piece. (The “M” is for master. It made sense at the time.) From here on out, it is just easier to mark all of the following pieces using this one.

9.
Draw your trim marks. Make sure to cut on the insides of the marks. Make as many of this size as you need. I needed eight for my project.

10.
Lightly sand all of your cuts. Be very careful, as the wood is prone to splinter.

11.
When you have all of them cut, you’ll move on to the next size.

12.
Proceed with the shorter sides in the same matter.

13.
Yay! You should now have several little piles of cut and sanded pieces.

14.
Now assemble. Lay down a thin bead of wood glue along the inside lines of your design. My wood glue starts setting up pretty quickly, so keep that in mind. You could do one piece at a time if you prefer.

15.
When all four pieces are in place, press down lightly. Some glue is going to ooze out here or there. Don’t worry, we’ll get to that.

16.
Use a scrap of wood to clean up any extra glue.
Okay, so I actually use my fingers, but that seemed sloppy to admit. And I tried a scrap of wood. It works too. You do you.

17.
If you find any of the pieces to be warped or bowed, use a binder clip to hold them in place while they dry.

18.
When you are confident that the glue is completely dry, go ahead and apply spackling to the joints.
Ha ha, here I am using my fingers again. Ah well.
Let this dry completely.

19.
More sanding! Don’t worry, it’s totally worth it. If you can’t get to the inside seams, break out the utility knife again.

20.
You are finally ready for finishing. I’m painting these in my favorite trim color to match the rest of my dollhouse.
Install with wood glue. Top with a piece of trim. You’re done!


![[Featured] Home is where the heart is](https://images.squarespace-cdn.com/content/v1/595db0b044024313332d1ef8/4d709e00-3324-4310-8fc7-4e12c12235fc/westwind+1.jpg)


![[Featured] House Hunter—Mini Modern Farmhouse](https://images.squarespace-cdn.com/content/v1/595db0b044024313332d1ef8/1635368524954-RFDD3B7IPNN7OTRDWE6Y/Mini+Modern+Farmhouse+Interior+Furnished.jpg)


![[Featured] Meet the ‘cloffice’](https://images.squarespace-cdn.com/content/v1/595db0b044024313332d1ef8/1622420833320-T5FVUAYDEA0ING4B0DRO/Mini+Cloffice+Tall_Phone.jpg)


![[Featured] Making a home](https://images.squarespace-cdn.com/content/v1/595db0b044024313332d1ef8/1619784319429-U4GKIWXVW76OCOH9H4OM/Long+Farmhouse+Living+Room.JPG)

![[Featured] Instagram Identities: Jessica Cloe Miniatures](https://images.squarespace-cdn.com/content/v1/595db0b044024313332d1ef8/1619784478243-8KCI6MIDSXD6ADUM5R1T/Bayview+House+Interior.jpg)

