
Modern Farmhouse Windows

We’re kind of suckers for windows. Our first dollhouse project came with 16 windows. Some required repair, but they were double-hung and included decorative plastic panels for the window “glass”. However, when we started the Long Farmhouse, we knew that windows were going to be pivotal.
For one thing, the homemade house is very deep, with some rooms completely inaccessible from the back of the house. So we marked out new window locations and cut the holes. Then we added trim to all of the windows and contemplated our next move. We wanted the look of modern farmhouse windows, but the option to remove the windows when needed.
After working through several options, here’s what we eventually came up with.

What You Will Need
Large binder clips
Small binder clips
Sanding block
Balsa strips
Basswood strips
Wood glue
Clear plastic sheets
Easy Cutter
Ruler/straight edge
Black Sharpie
Pencil (very fine lead, if possible)

1.
We used thin strips of 1/2 inch wood to create the internal frames for each window.
Start by measuring and marking for the bottom and top pieces.

2.
While it might seem like taking measurements would be the way to go, we found that some of the windows were not constructed with much precision, so we ended up marking the lengths instead.

3.
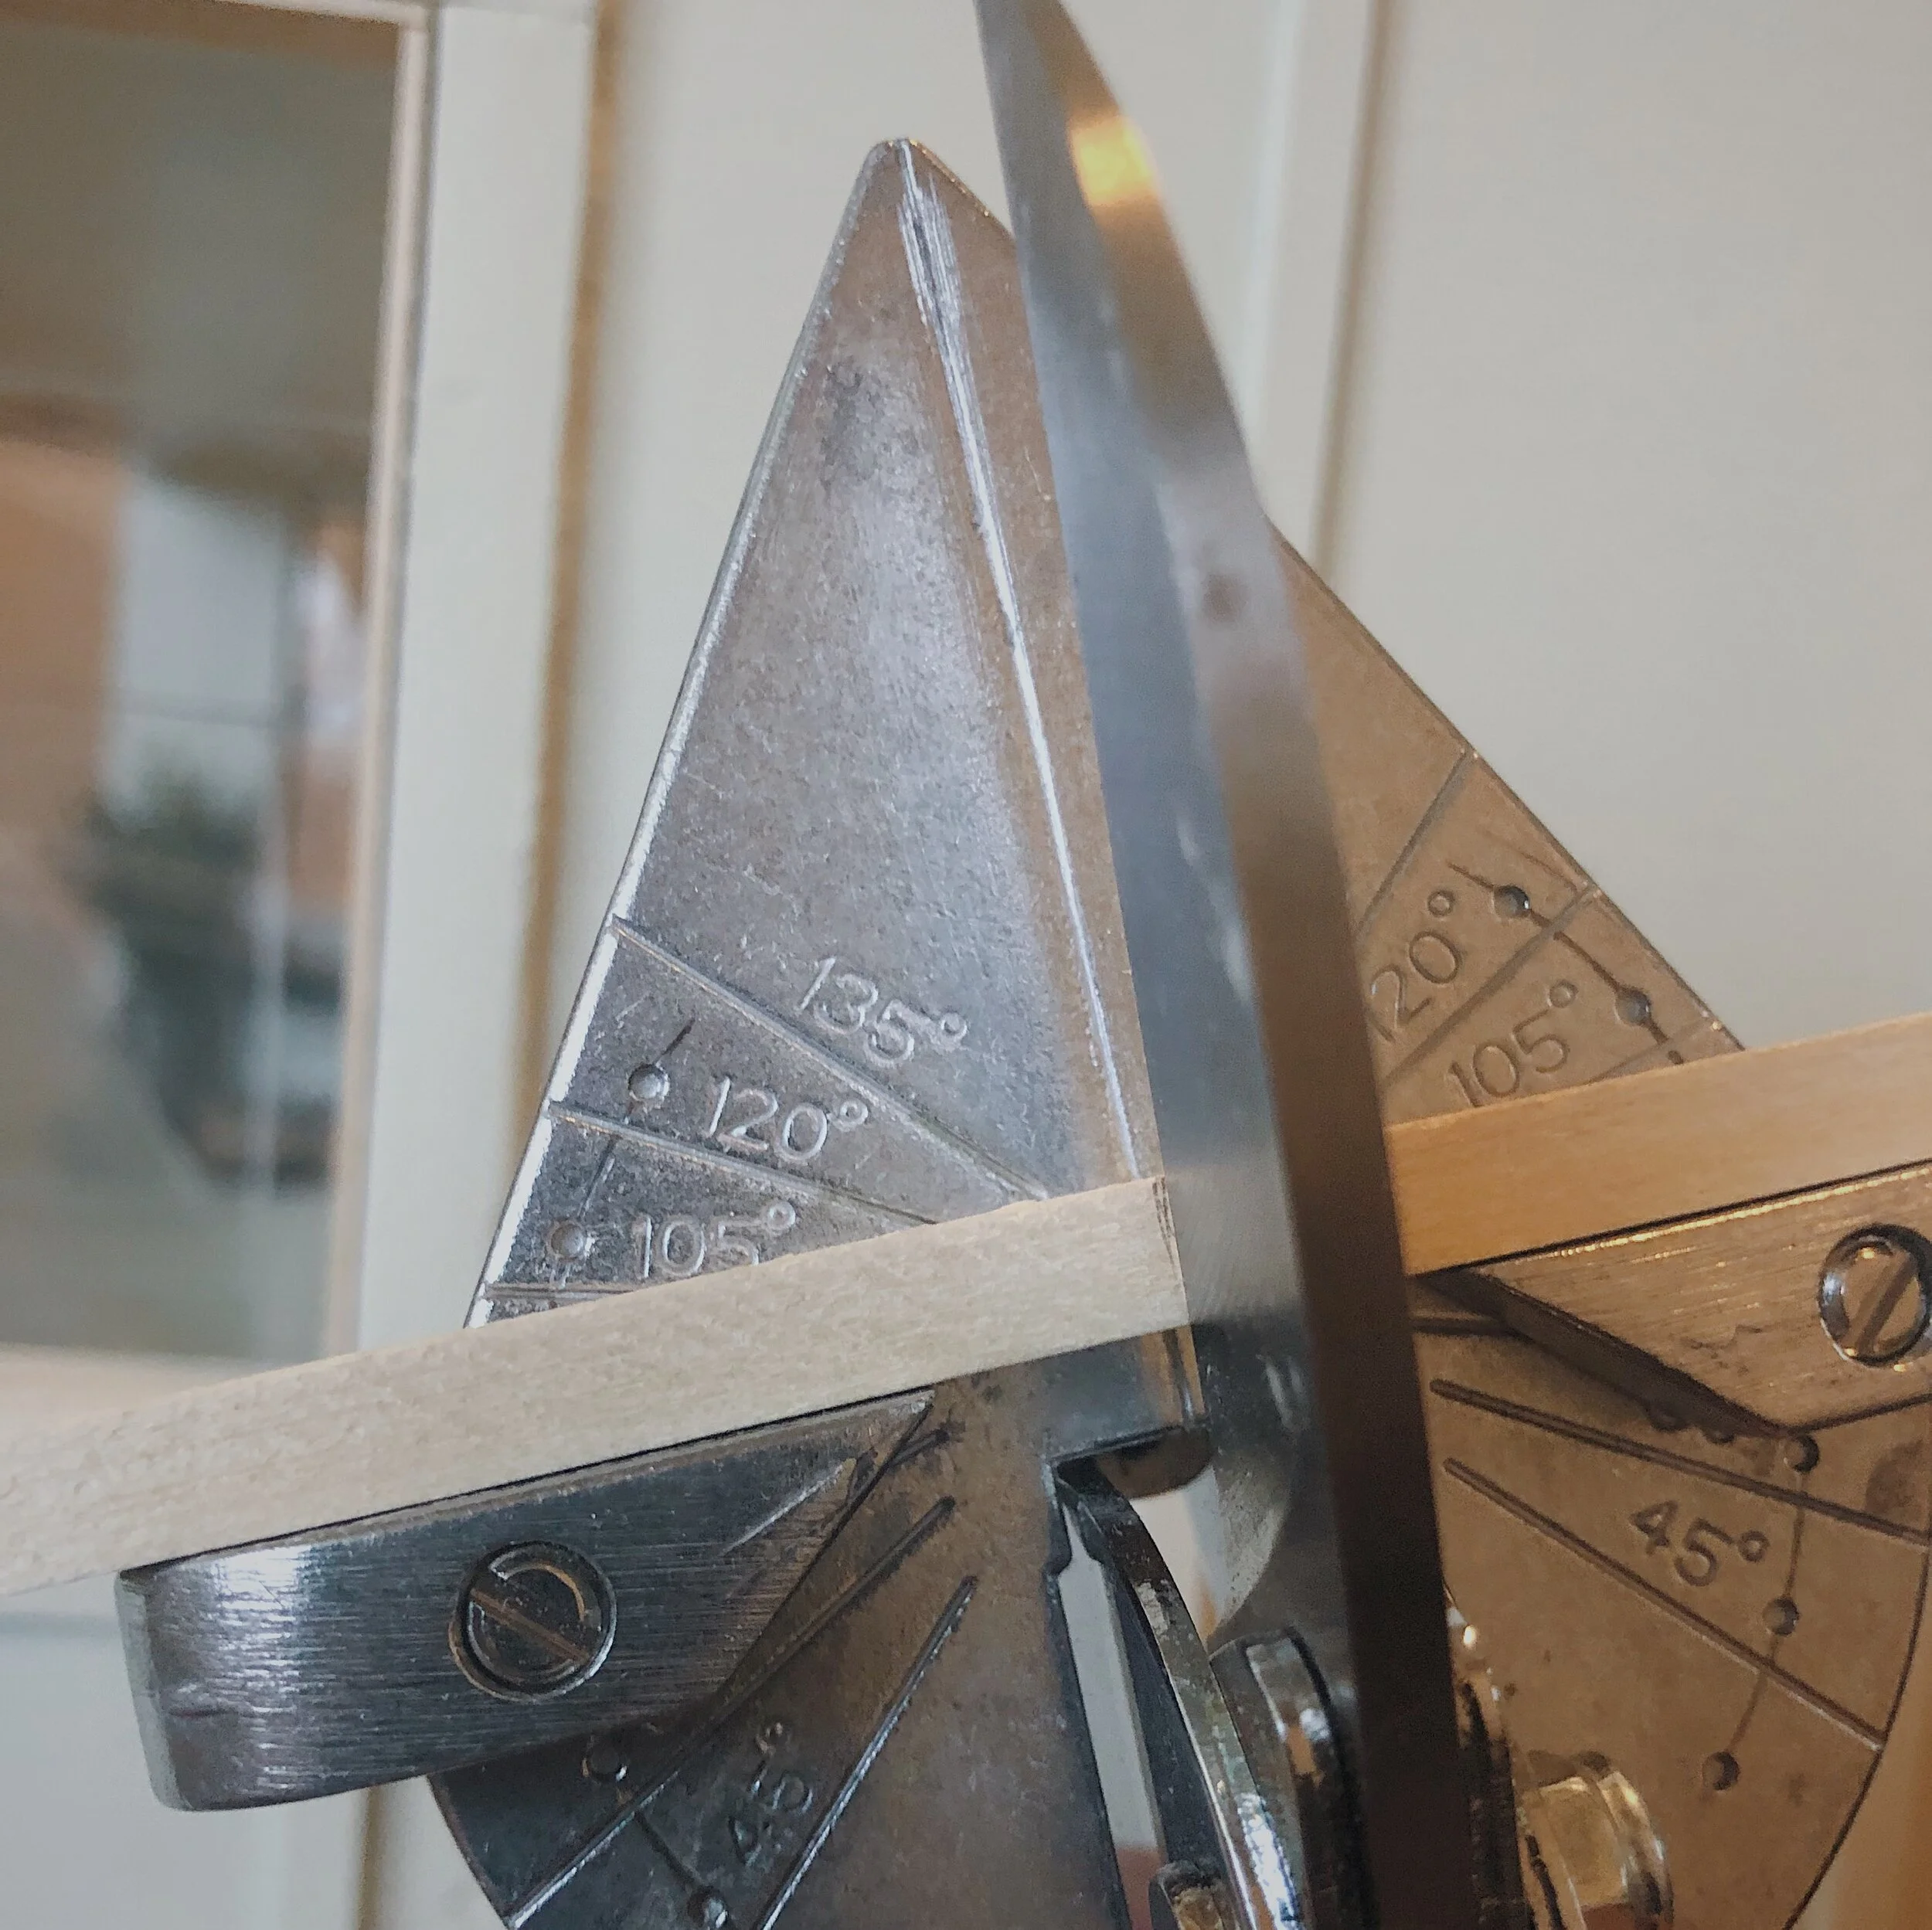
Cut to length. An Easy Cutter is a great option at this point.

4.
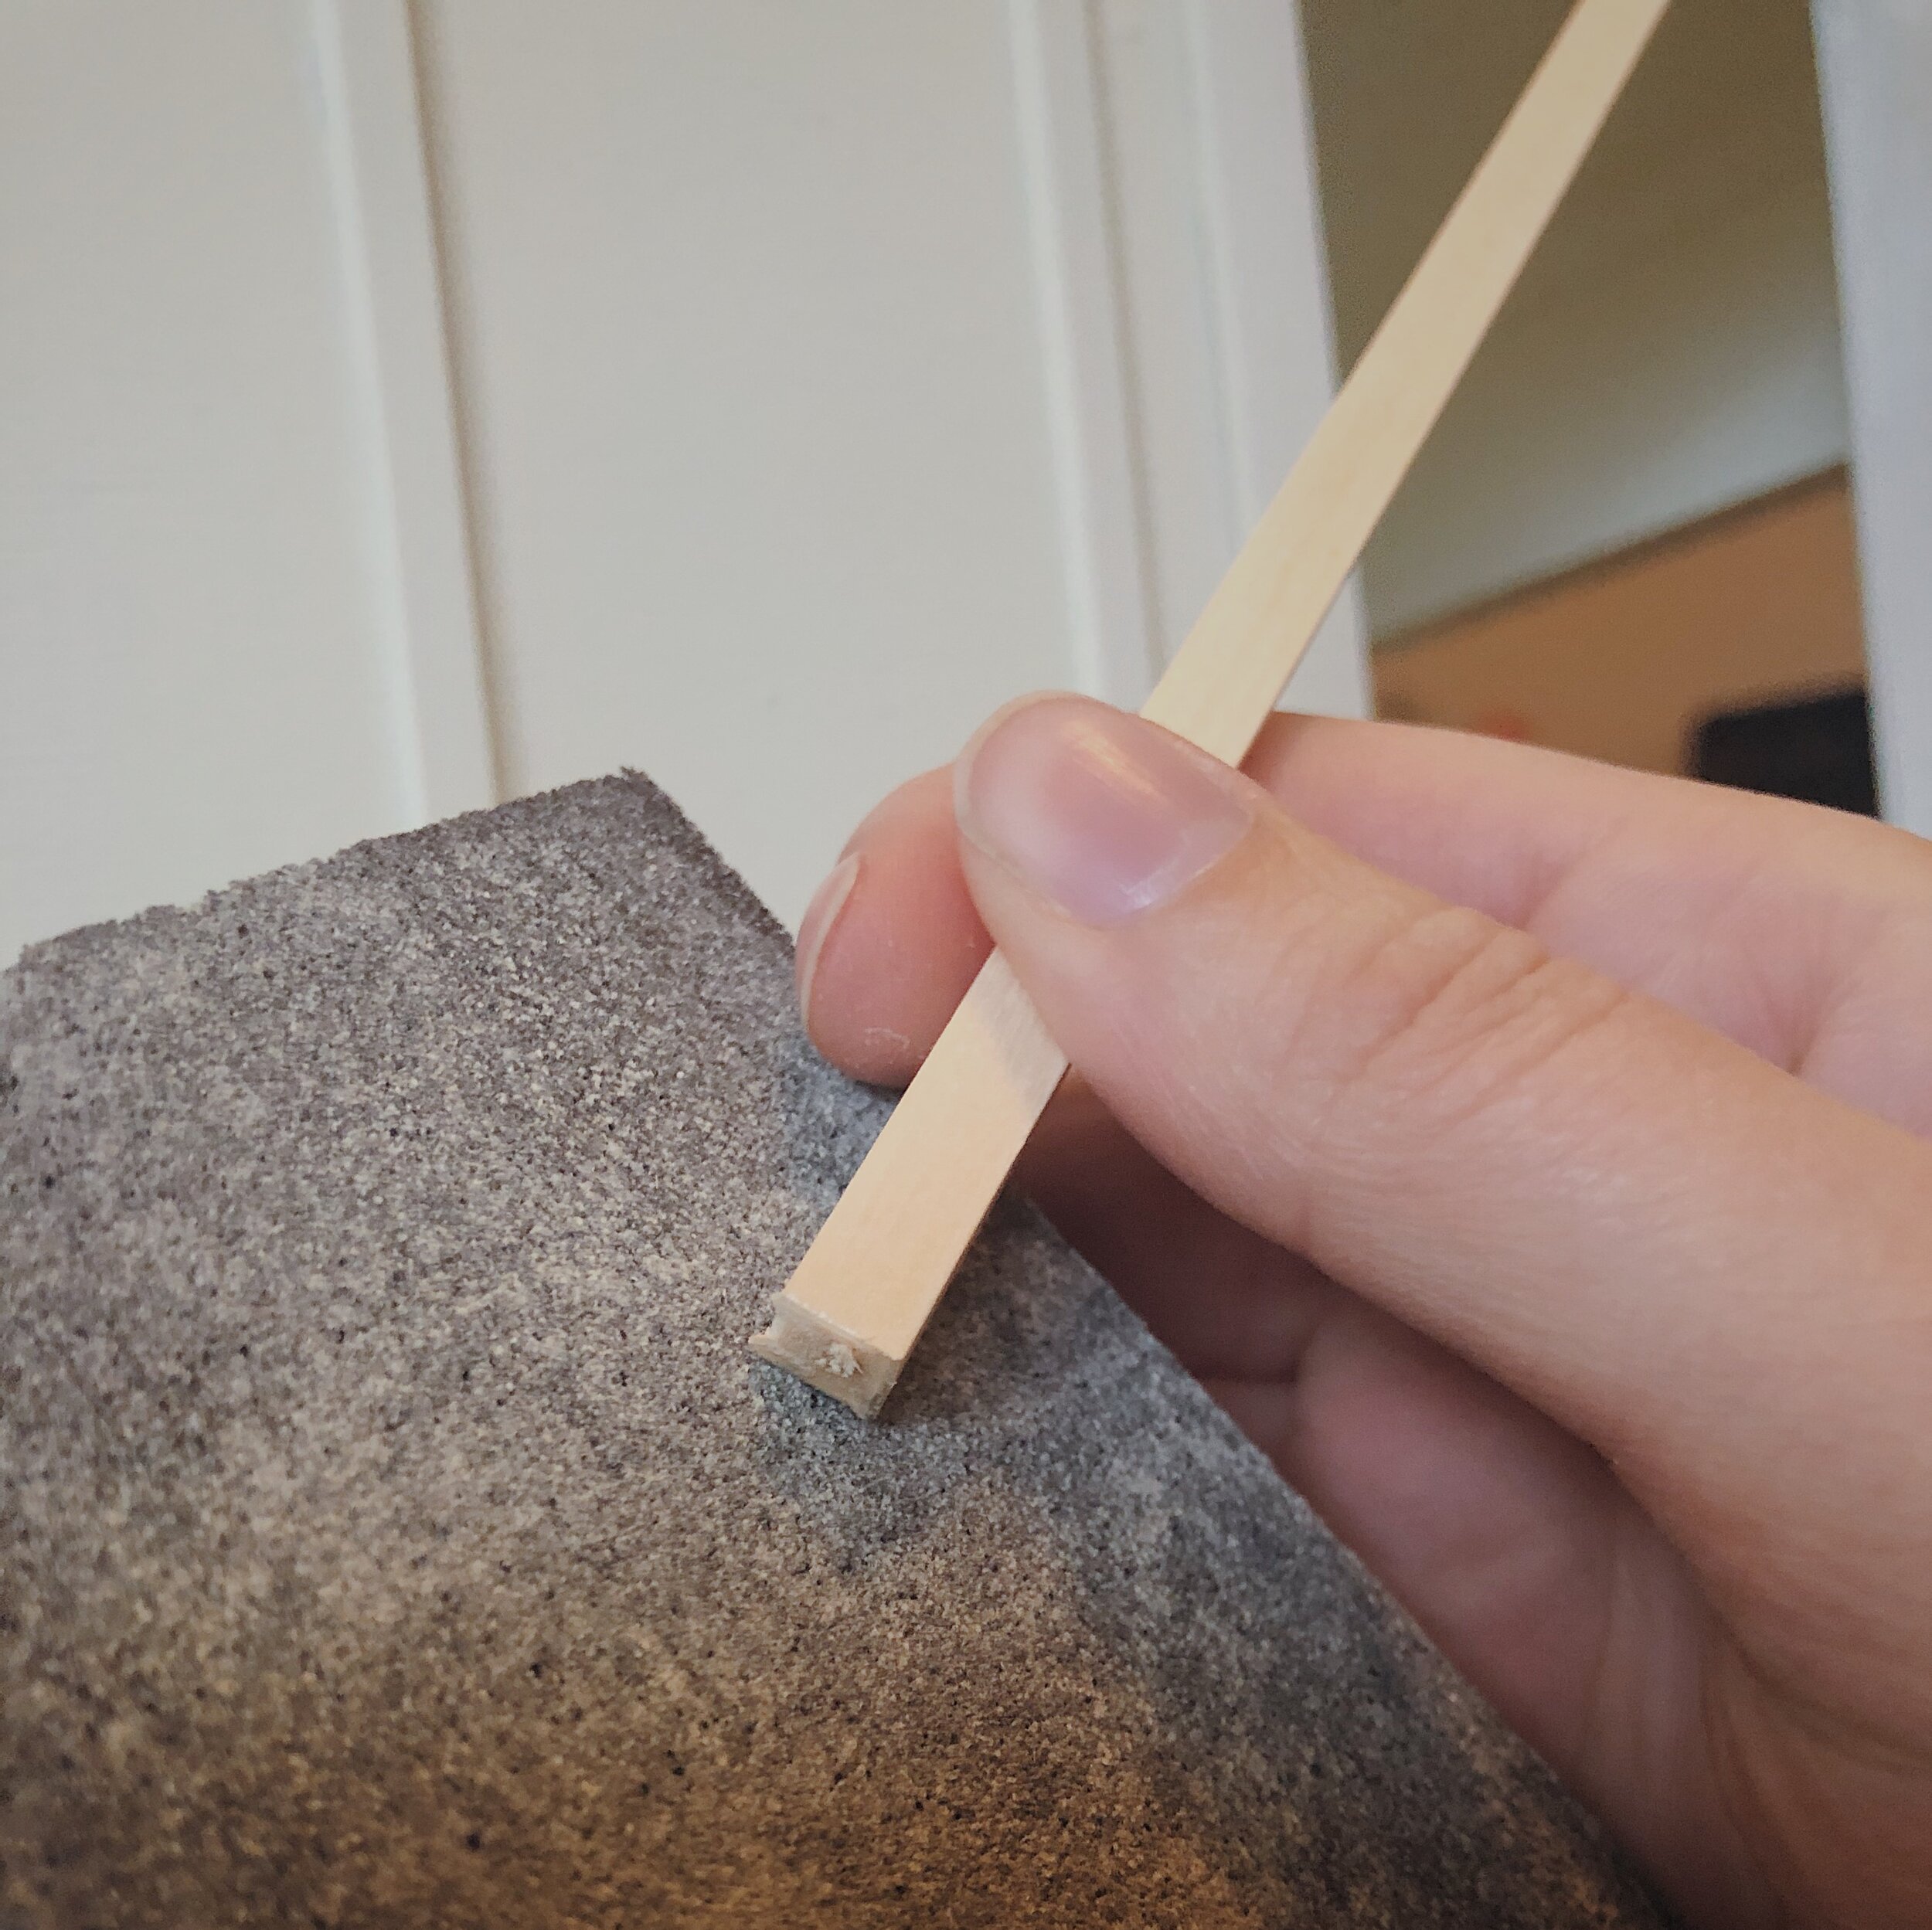
And always sand. Seriously do not skip the sanding.

5.
A quick dry fit is always a good idea. Repeat for the top piece.

6.
Now, drop in the two pieces that you’ve just prepared. It’s time to measure the side pieces.

7.
Once you have all four pieces trimmed and sanded, dry fit to ensure that everything is ready to glue.

8.
Add a tiny line of glue to the ends of your two side pieces.
A very tiny amount goes a long way. (And wood glue drips are the absolute worst.)
You’ll also want to avoid actually gluing the internal frame to the window opening if you want the windows to be removable.

9.
While your interior frame is drying, plan out your window pane design.
The Long Farmhouse has both wide and tall windows, but we wanted them to have a similar window pane design to unify the overall look.

10.
For the wide windows, we chose to install two vertical 1/4 inch posts.
If you’ve made a template, use it to mark the locations. (Full disclosure, I just really hate doing the math.)

11.
Again, mark your lengths.
12.
Cutting through 1/4 inch pieces isn’t quite as fun as cutting through the thinner strips.
The Easy Cutter still gets the job done, but there is definitely the temptation to get out the power tools.
13.
Again with the sanding—even more important with these thicker pieces.

14.
If your internal frames are dry (follow the instructions on your glue bottle for dry times) you can pop them out to fit in the posts.

15.
Once your posts are in place, it is actually quite convenient to gently slide the whole thing back in place and let it dry there.

16.
We repeated a similar process for the tall windows, but using the tall window design template.
The big thing for these windows was that the posts actually joined up in the middle, so we used a great many binder clips.

17.
Finally to painting! We gave all of the frames a couple of coats of flat black.

18.
And, on to the “glass” part of the window. If you’ve been hanging onto any clear packaging material, this would probably be the time to use it.
If not, you can purchase sheets of clear plastic for crafting. You’ll want to cut the pieces to fit inside the internal window frame.

19.
Since we made templates, we just centered each window sheet and used a straight edge and a black sharpie to fill in the thinner window pane lines.

That’s It!
Pop the clear sheet into the frame and glue along the posts. Use binder clips to hold while the glue sets.
Slide into place when dry!


![[Featured] Home is where the heart is](https://images.squarespace-cdn.com/content/v1/595db0b044024313332d1ef8/4d709e00-3324-4310-8fc7-4e12c12235fc/westwind+1.jpg)


![[Featured] House Hunter—Mini Modern Farmhouse](https://images.squarespace-cdn.com/content/v1/595db0b044024313332d1ef8/1635368524954-RFDD3B7IPNN7OTRDWE6Y/Mini+Modern+Farmhouse+Interior+Furnished.jpg)


![[Featured] Meet the ‘cloffice’](https://images.squarespace-cdn.com/content/v1/595db0b044024313332d1ef8/1622420833320-T5FVUAYDEA0ING4B0DRO/Mini+Cloffice+Tall_Phone.jpg)


![[Featured] Making a home](https://images.squarespace-cdn.com/content/v1/595db0b044024313332d1ef8/1619784319429-U4GKIWXVW76OCOH9H4OM/Long+Farmhouse+Living+Room.JPG)

![[Featured] Instagram Identities: Jessica Cloe Miniatures](https://images.squarespace-cdn.com/content/v1/595db0b044024313332d1ef8/1619784478243-8KCI6MIDSXD6ADUM5R1T/Bayview+House+Interior.jpg)

